
Ever find yourself staring into the fridge on a busy weeknight, wondering what to cook that’s fast, flavorful, and family-approved? That’s where these crispy chicken cutlet recipes come in. Whether you’re craving something golden and pan-fried or a lighter, oven-baked version, this recipe has you covered.
I love how versatile chicken cutlet recipes are—you can serve them over a fresh salad, tuck them into a sandwich, or pair them with pasta for a cozy dinner. Plus, they’re made with simple ingredients you probably already have on hand. And the best part? They’re ready in under 30 minutes, making them a go-to for easy weeknight meals.
Let’s dive into the steps to make perfect chicken cutlets that are juicy on the inside and irresistibly crisp on the outside.

How to Make Perfect Chicken Cutlet Recipes for Busy Weeknights
4
servings10
minutes25
minutes400
kcalIngredients
4 boneless, skinless chicken breasts (or thighs, if preferred)
1 cup all-purpose flour
2 large eggs, beaten
1 ½ cups panko breadcrumbs (or Italian breadcrumbs for extra flavor)
1/3 cup grated parmesan cheese (optional, for extra flavor)
Salt and black pepper to taste
1 teaspoon garlic powder (optional)
1 teaspoon dried oregano (optional)
¼ cup olive oil or vegetable oil (for frying)
Lemon wedges (for serving, optional)
Directions
- Prepare the Chicken:
Place each chicken breast between two sheets of plastic wrap or parchment paper. Gently pound the chicken to about ½ inch thickness using a meat mallet or rolling pin. This ensures even cooking. - Set up Breading Station:
In one shallow dish, add the flour and season with salt, pepper, garlic powder, and oregano. In a second dish, beat the eggs. In a third dish, combine the panko breadcrumbs and parmesan cheese (if using). - Bread the Chicken:
Dredge each chicken cutlet in the flour, ensuring it’s coated evenly. Dip into the egg wash, then coat thoroughly with the breadcrumb mixture. Press lightly to ensure the breadcrumbs stick. - Cook the Cutlets:
Heat the olive oil in a large skillet over medium-high heat. Once hot, carefully add the breaded chicken cutlets. Cook for 3-4 minutes per side, or until golden brown and crispy. The internal temperature of the chicken should reach 165°F (74°C) when checked with a meat thermometer. - Serve:
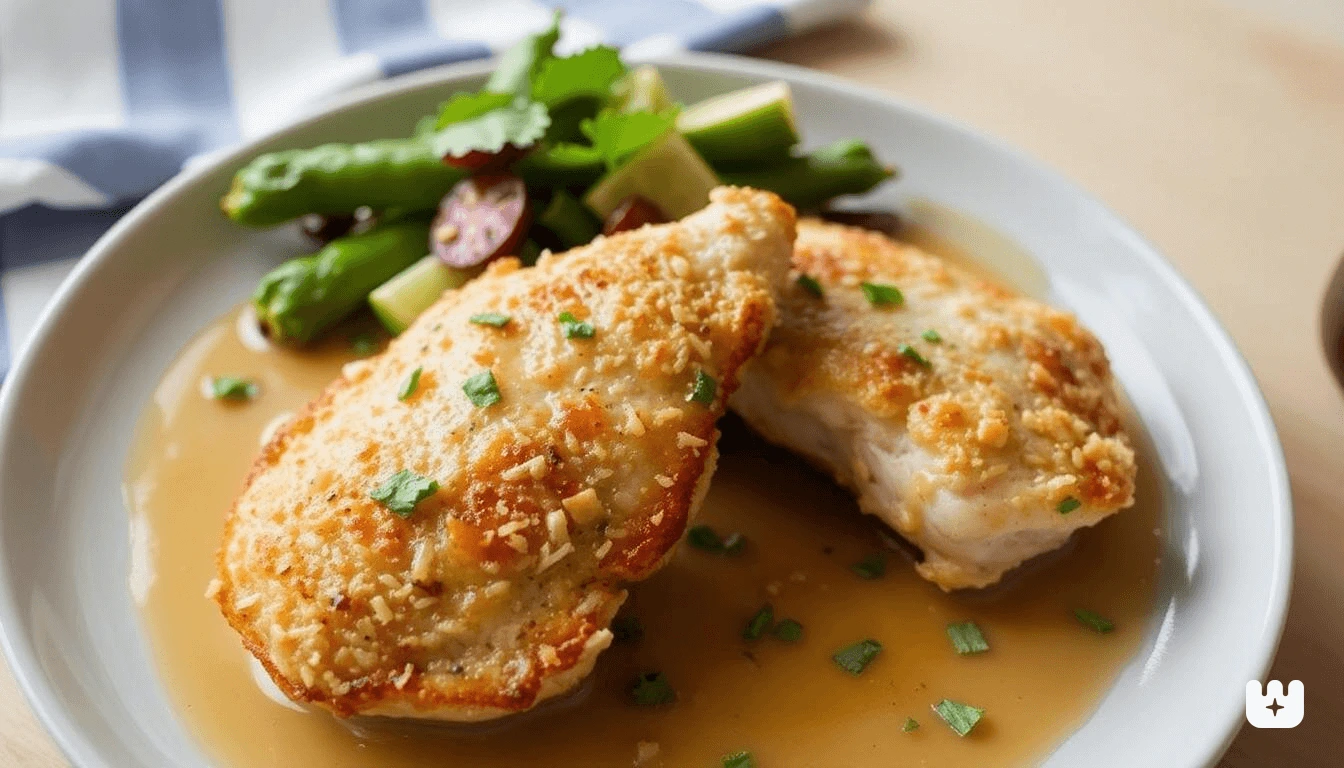
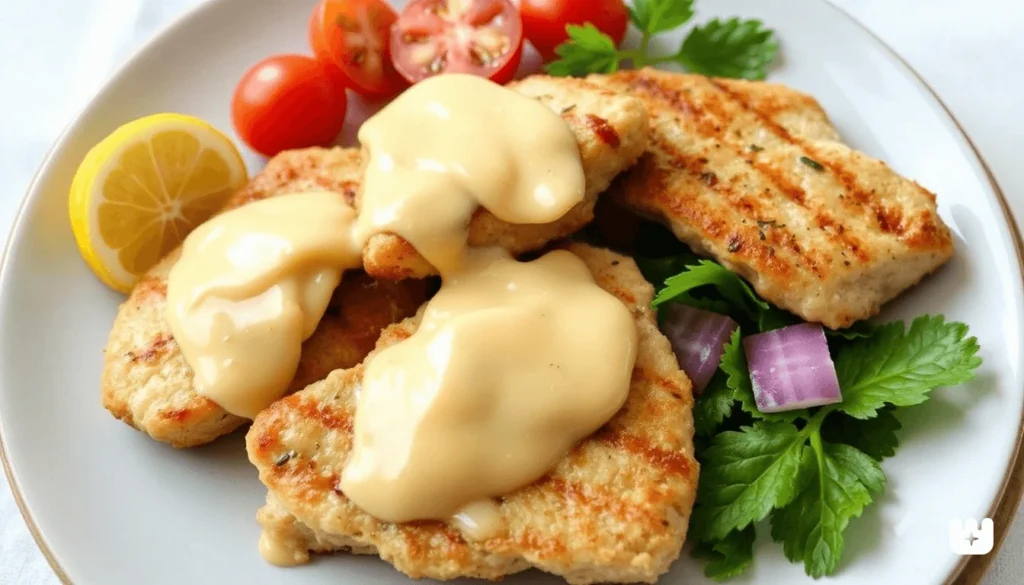
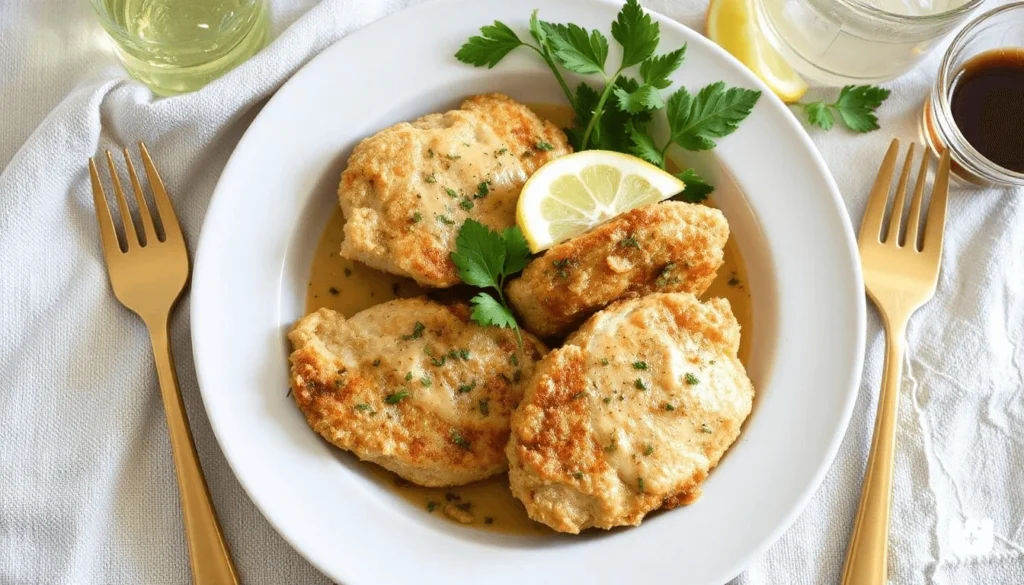
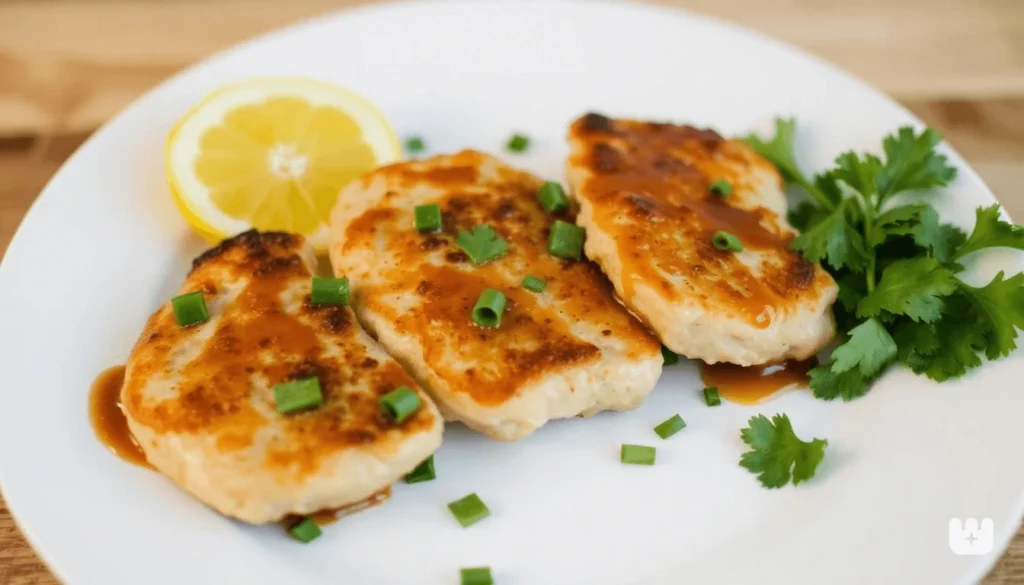
Remove the cutlets from the skillet and place them on a wire rack to drain excess oil. Serve with lemon wedges and your favorite side dishes, such as roasted vegetables, mashed potatoes, or a simple salad.
Recipe Video
Notes
- Healthier Option: For a lighter version, bake the chicken cutlets at 400°F (200°C) for 20-25 minutes, flipping halfway through. If you have an air fryer, you can cook the cutlets at 375°F (190°C) for around 10-12 minutes.
- Freezing Tip: After breading the chicken, place the cutlets on a baking sheet and freeze them until firm. Store in a freezer-safe bag for up to 3 months. When ready to cook, bake or fry straight from the freezer without thawing.
Why Chicken Cutlets Are a Weeknight Dinner Hero
When time is tight and hunger is high, chicken cutlet recipes are the kind of recipe you’ll be glad to have in your back pocket. They cook quickly—usually in under 15 minutes—making them a lifesaver for those hectic weeknights when you need dinner on the table fast.
Another reason to love them? The ingredients are refreshingly simple. Most versions call for pantry staples like chicken breasts, eggs, breadcrumbs, and a little oil or butter. No fancy shopping list required!
And let’s talk versatility. Whether you prefer your cutlets pan-fried for that golden crunch, baked for a lighter touch, or air-fried for a guilt-free crisp, this dish adapts to your cooking style with ease.
Best of all, everyone loves them—from picky eaters to seasoned foodies. Serve them as the star of a meal or slice them into salads, wraps, or sandwiches. However you plate them, chicken cutlets are a true family dinner favorite.
Ingredients You’ll Need for Perfect Chicken Cutlets
To make perfect chicken cutlet recipes, you don’t need a lot of fancy ingredients—just a handful of pantry staples. But it’s the combination of these ingredients that transforms a simple dish into something special. Below, we’ll break down the key elements that make up the perfect chicken cutlet.
Chicken Breasts (Sliced and Pounded Thin)
The backbone of every great chicken cutlet is, of course, the chicken breast. You’ll want to choose fresh, boneless, skinless chicken breasts for the best results. These are easy to work with, and when sliced thinly, they cook quickly and evenly. Start by slicing the chicken breasts into thinner pieces, about 1/2-inch thick. This ensures they cook through fast without drying out.
To make your chicken even more tender and uniform, use a meat mallet or rolling pin to gently pound the pieces. This helps break down the fibers, making each bite more succulent. Not only does this method improve texture, but it also helps the cutlet maintain a crispy exterior without being tough on the inside.
Pro Tip: If you’re short on time, you can purchase pre-sliced or pre-pounded chicken breasts, but I recommend doing it yourself for the best results!
Breadcrumbs (Panko or Italian-Style)
The magic of crispy chicken cutlets lies in the breading. This coating gives the chicken its signature crunch while also locking in the juicy flavor inside. The two most common types of breadcrumbs are panko and Italian-style.
- Panko breadcrumbs: These Japanese-style breadcrumbs are larger and flakier than traditional breadcrumbs, making them perfect for a super-crispy finish. They absorb less oil, which means your cutlets stay crisp for longer, and they give the dish a delicate, airy crunch.
- Italian-style breadcrumbs: If you’re craving an extra layer of flavor, Italian breadcrumbs are the way to go. These breadcrumbs are already seasoned with herbs like oregano, basil, and garlic powder, which adds depth to the flavor profile. They are typically more compact than panko, so the texture is slightly denser, which some people prefer.
You can mix the two to get the best of both worlds—a light, crispy exterior with a burst of Italian herbs and seasoning. The choice of breadcrumb comes down to personal preference, but both will give your cutlets that golden crunch we all crave!
Eggs, Flour, and Parmesan Cheese for Breading
The breading process is where the magic happens. You’ll need three components to get the perfect coat on each piece of chicken: flour, eggs, and parmesan cheese.
- Flour: Start by dredging the chicken pieces in flour. This first layer helps the egg wash adhere more effectively. Make sure to season the flour with a pinch of salt and pepper to start building flavor right from the base.
- Eggs: Next, dip the chicken into a beaten egg wash. This creates a moist, sticky surface that helps the breadcrumbs hold onto the chicken. If you want to take it up a notch, you can even add a little mustard or milk to the eggs to enrich the flavor, though it’s optional.
- Parmesan cheese: The secret ingredient to elevate your breading? Parmesan cheese. Adding freshly grated parmesan into the breadcrumbs gives them a deeper, richer flavor with a salty, umami kick. The cheese also crisps up beautifully in the pan or oven, adding an irresistible golden finish.
Don’t skip this step—parmesan is what makes your chicken cutlets stand out from the crowd!
Cooking Fats: Olive Oil, Butter, or Cooking Spray
The fat you choose to cook your chicken cutlets in can make a big difference in the final texture and flavor. Here are your options:
- Olive oil: This is a popular choice for cooking chicken cutlets because it adds a light, slightly fruity flavor while keeping the cutlets crisp. Olive oil also works well in air frying, providing a nice balance of crispiness without excessive grease. For a healthier alternative, you can use extra virgin olive oil, which has a more robust flavor.
- Butter: If you want a richer, more indulgent flavor, butter is your go-to fat. It imparts a slightly nutty, savory taste that pairs perfectly with the parmesan in the breadcrumbs. While it can brown quickly, so keep an eye on the heat to avoid burning. If you prefer, you can also use a combination of butter and olive oil for the best of both worlds.
- Cooking spray: If you’re looking for a lighter option or want to bake your cutlets, cooking spray (olive oil or vegetable oil-based) is an excellent alternative. It helps crisp up the cutlets without excess fat, keeping them air-fried crispy while still light on calories.
Optional Add-Ins for Extra Flavor
If you’re feeling adventurous, you can play with the ingredients to customize the flavor profile. Adding a little garlic powder, onion powder, or paprika to the breadcrumbs can give the cutlets an extra burst of flavor. Fresh herbs like parsley or oregano mixed into the breadcrumbs can also make a huge difference, especially if you’re using Italian-style breadcrumbs.
You could even experiment with cayenne pepper for a little heat or lemon zest to brighten up the flavor. The options are endless!
Step-by-Step Guide to Making Chicken Cutlets
Making perfect chicken cutlet recipes is simpler than you might think, and with this step-by-step guide, you’ll be on your way to creating crispy, juicy cutlets in no time! Follow these easy steps to get that golden, irresistible crunch everyone loves.
1. Pound the Chicken Evenly with a Meat Mallet
The first step to a great chicken cutlet is getting the chicken pounded thin. This is crucial for even cooking and a tender bite. Place your chicken breasts between two sheets of plastic wrap or parchment paper to prevent splatter. Using a meat mallet or rolling pin, gently pound the chicken to about 1/2 inch thick.
This step not only helps the chicken cook quickly but also ensures the breading adheres evenly. Be sure to pound evenly—this helps prevent any areas from being too thick, which could result in uneven cooking. If you’re in a rush, you can also cut the chicken breasts horizontally into thinner pieces.
2. Dredge Process: Flour → Egg → Breadcrumbs (Add Parmesan for Flavor)
Now it’s time for the breading! The dredging process is a three-step coating system that ensures your chicken cutlets come out crispy and flavorful.
- Flour: Start by lightly coating the chicken in flour. This creates a dry surface that helps the egg adhere better. Season the flour with a pinch of salt and pepper to enhance the flavor from the inside out.
- Egg: Dip the flour-coated chicken into a bowl of beaten eggs. The egg wash helps the breadcrumbs stick to the chicken, forming a golden, crispy layer once cooked. For extra flavor, consider adding a splash of milk or a bit of mustard to the egg mixture.
- Breadcrumbs (and Parmesan): Finally, coat the chicken in your choice of breadcrumbs—whether panko for a light crunch or Italian-style for an extra flavor boost. If you’re using Italian breadcrumbs, parmesan might already be mixed in, but for extra richness, you can add freshly grated parmesan cheese to the breadcrumbs. The cheese adds flavor and helps the breadcrumbs crisp up beautifully during cooking.
Ensure the chicken is evenly coated with each layer, pressing lightly to make sure the breadcrumbs stick.
3. Choose Your Cooking Method: Pan-Fry, Bake, or Air-Fry
Now that your cutlets are breaded, it’s time to cook them! You have a few options depending on what you’re in the mood for:
- Pan-Fry: For the classic crispy chicken cutlet, heat about 1/4 inch of olive oil or butter in a non-stick skillet over medium heat. Once the oil is hot (but not smoking), gently place the breaded chicken cutlets in the pan. Cook for about 3-4 minutes per side or until golden brown and crispy. This method ensures that the chicken stays juicy while the outside crisps up perfectly.
- Bake: If you’re looking for a lighter option, you can bake your cutlets. Preheat the oven to 400°F (200°C) and place the breaded chicken on a baking sheet lined with parchment paper or a wire rack for optimal air circulation. Bake for about 20-25 minutes, flipping halfway through, until the cutlets are crispy and golden.
- Air-Fry: For an even lighter alternative, you can use an air fryer. Preheat the air fryer to 375°F (190°C). Lightly spray the basket with cooking spray, and place the breaded cutlets in a single layer. Air fry for 10-12 minutes, flipping halfway, until the cutlets are crispy and cooked through.
4. Cook to 165°F Internal Temp Using a Food Thermometer
To make sure your chicken cutlets are safely cooked through, always check the internal temperature using a food thermometer. Insert the thermometer into the thickest part of the chicken—it should read 165°F (74°C) for the chicken to be fully cooked.
This is a crucial step to ensure your chicken is safe to eat while remaining juicy on the inside. If you don’t have a food thermometer, just cut into the thickest part of the cutlet to make sure the meat is opaque and the juices run clear.
This step-by-step breakdown ensures a foolproof approach to making crispy, juicy chicken cutlet recipes that are perfect for any weeknight dinner.
Tips for Crispy and Juicy chicken cutlet recipes Every Time
Getting crispy chicken cutlet recipes that are juicy on the inside requires a few key techniques. These tips will ensure you get perfectly golden, crispy cutlets every time—whether you’re frying, baking, or air-frying.
1. Use Panko for Extra Crunch
If you’re aiming for that ultra-crispy exterior, panko breadcrumbs are your best friend. Unlike traditional breadcrumbs, panko is light and flaky, creating a much crispier texture. The larger flakes help the cutlet maintain its crunch, even if it sits for a few minutes after cooking. Whether you’re frying or baking, panko breadcrumbs will give your chicken a delightful crispiness that’s hard to beat.
2. Let the Breaded Chicken Rest Before Frying
Once your chicken is breaded, it’s important to let it rest for a few minutes before cooking. This brief resting period allows the breading to set, ensuring it sticks better while cooking. Without this step, the breading might slip off during frying, resulting in uneven texture. Resting also helps the cutlets cook more evenly, giving them a crispy exterior and a juicy interior.
3. Avoid Overcrowding the Pan or Air Fryer
Whether you’re using a skillet, air fryer, or oven, overcrowding the cooking space is a common mistake. When the cutlets are too close together, they can steam instead of crisp up, leading to soggy chicken. Instead, cook in batches to allow each cutlet enough room to get that golden, crispy exterior. This is especially important when pan-frying or using an air fryer to achieve the best texture.
4. Drain on a Wire Rack, Not Paper Towels
After cooking your chicken cutlets, it’s tempting to place them on paper towels to drain the excess oil, but this can cause the crust to soften. Instead, place your cooked cutlets on a wire rack over a baking sheet. This allows air to circulate around the chicken, keeping the breading crisp and preventing it from becoming soggy. If you must, gently blot any excess oil with a paper towel, but let the cutlets rest on the rack for the best texture.
Variations and Serving Ideas for Busy Weeknights
chicken cutlet recipes are incredibly versatile, making them perfect for mixing up your weeknight meals. From classic Italian-style dishes to healthier alternatives, there’s no shortage of ways to enjoy this easy, delicious recipe. Here are some fun and creative variations to try:
1. Italian-Style: Serve with Pasta or Marinara
For a quick and satisfying dinner with an Italian twist, serve your crispy chicken cutlet recipes alongside your favorite pasta and marinara sauce. The tender, juicy chicken pairs beautifully with the savory tomato sauce and spaghetti or linguine. You can even top the cutlets with a sprinkle of parmesan cheese and a few fresh basil leaves for that authentic touch. Whether you’re cooking for a crowd or just for yourself, this dish is sure to impress.
2. Healthy Version: Baked Chicken Cutlets with Roasted Veggies
If you’re looking for a healthier option, try baked chicken cutlets served with a side of roasted veggies. Instead of frying, coat the chicken in breadcrumbs and bake them in the oven to keep things lighter. Pair them with a colorful mix of roasted vegetables like zucchini, bell peppers, and sweet potatoes. The combination of crispy chicken and tender veggies makes for a well-balanced, satisfying meal that doesn’t compromise on flavor.
3. Sandwich Night: Chicken Cutlet Sandwich with Slaw
Transform your chicken cutlets into a fun and hearty sandwich night option! Place a crispy cutlet on a toasted bun and top with creamy coleslaw for a deliciously crunchy contrast. Add some pickles or a drizzle of mayo or spicy mustard for an extra burst of flavor. This simple yet satisfying sandwich is perfect for a casual weeknight dinner or when you’re entertaining guests.
4. Meal Prep Tip: Freeze Breaded Cutlets for Later
One of the best things about chicken cutlets is that they freeze well, making them a great choice for meal prep. After breading the chicken, you can freeze the cutlets on a baking sheet until solid, then transfer them to a freezer-safe bag or container. When you’re ready to cook, simply bake or fry the frozen cutlets straight from the freezer—no need to thaw! This is a game-changer for those busy days when you need a fast, homemade dinner without the hassle.
These variations and serving ideas show just how adaptable chicken cutlets can be, making them perfect for any busy weeknight. Whether you’re in the mood for Italian, want a healthier option, or are craving a sandwich, you’ve got options to suit any taste.
FAQs About Chicken Cutlets
1. What is the best way to cook chicken cutlets?
The best way to cook chicken cutlet recipes depends on your preferences. Pan-frying in oil or butter gives the cutlets a crispy, golden crust and a juicy interior, making it the most traditional method. If you’re looking for a healthier option, baking at 400°F (200°C) on a wire rack allows the chicken to cook evenly while staying crisp. For a low-fat alternative, air frying is an excellent choice, producing a crispy exterior without the extra oil. Each method results in delicious, tender cutlets—so it’s all about how much time you have and how you prefer your chicken!
2. What can I make with a chicken cutlet?
Chicken cutlets are incredibly versatile! You can serve them as the star of the meal with simple sides like mashed potatoes, salad, or roasted veggies. Alternatively, use them to make chicken parmesan by layering the cutlet with marinara sauce and melted cheese. You can also slice the cutlets and use them in sandwiches, wraps, or salads. They’re great for meal prep as well, and you can store leftovers in the fridge or freeze them for later!
3. Do you dip cutlets in egg or flour first?
For the perfect breading, you should dip the cutlet in flour first. This step helps create a dry surface that allows the egg wash to stick better. After the egg, coat the chicken in breadcrumbs for a crispy exterior. The flour creates a light coating that helps the egg adhere, ensuring a nice, even breading on the chicken.
4. Is it better to bake or fry breaded chicken?
It depends on what you’re looking for! Frying chicken cutlets in oil or butter creates a crispier texture with a golden-brown finish. However, it’s higher in fat and calories. On the other hand, baking the chicken cutlets results in a lighter version of the dish, though it may not be as crispy. If you prefer a healthier option without sacrificing too much crunch, baking on a wire rack can still give you a nice texture while cutting down on excess oil.
5. Does KFC fry or bake their chicken?
KFC is known for its famous fried chicken, which they cook by deep-frying. This method gives their chicken a crunchy exterior and juicy interior, creating that signature texture. KFC uses a special blend of herbs and spices in their batter to give the chicken its distinct flavor.
6. Should I use flour for breaded chicken?
Yes, flour is an essential step in breading chicken. It helps to create a dry surface on the chicken, which allows the egg to stick more easily. The flour also forms a light coating that holds the breadcrumbs in place, helping the breading stay intact during cooking. It’s a crucial part of the breading process, ensuring the final texture is both crispy and delicious.